


I’ve always been confused as to how I could simultaneously have an oily scalp, dry hair, and flaking all at once, but somehow my hair managed to do it all. I had days that I’d avoid tying my hair in a ponytail because I knew when I took it down people would be able to see flakes. I had days when I was running late to work and had to jump into the shower because I had an inexcusable amount of flakes on day two hair. I even had days when I’d come out of the shower, check my hair in the mirror, and see flakes still stuck to my roots. I’d be lying if I said I haven’t cried about it.
In spite of all this, I never ventured back into the realm of dandruff shampoos, because in my brief childhood experience with it, it seemed to make my condition even worse. Then, when I started my curly hair journey in March of this year, I stumbled upon the solution to my itchy, flaky scalp. After implementing my new routine, I noticed that I didn’t see any flaking despite tying my hair up every night and letting it down in the mornings, and my hair could last 6 days between washes without getting greasy.
Before we jump in, I want to note that I have been using sulfate-free shampoo for nearly 10 years now. Sulfates are foaming cleansing agents often found in shampoo and body wash products, which people with curly or color-treated hair may avoid because of their drying effect on strands and scalp. While I did still struggle with flaking until last year, I do think avoiding sulfates helped reduce the severity of it.
Note: scalp itching and flaking is fairly common and often harmless, but can sometimes be caused by a number of underlying health conditions. The recommendations in this article are not intended to be medical advice, and what worked for me may not work for everyone. If you are experiencing pervasive symptoms, check in with a medical provider to rule out a skin or scalp condition. If you have an existing skin or scalp condition, check with a medical provider before trying any changes to your routine.
So without further ado, the secret to my flake-free success is… oil! To some, this may come as no surprise, because oiling the hair and scalp is a cultural beauty and wellness practice in many parts of South Asia. However, I’d always treated oiling my hair as a special treat to make my hair softer – like an occasional hair mask – instead of a way to manage problems I was having with my hair and scalp.
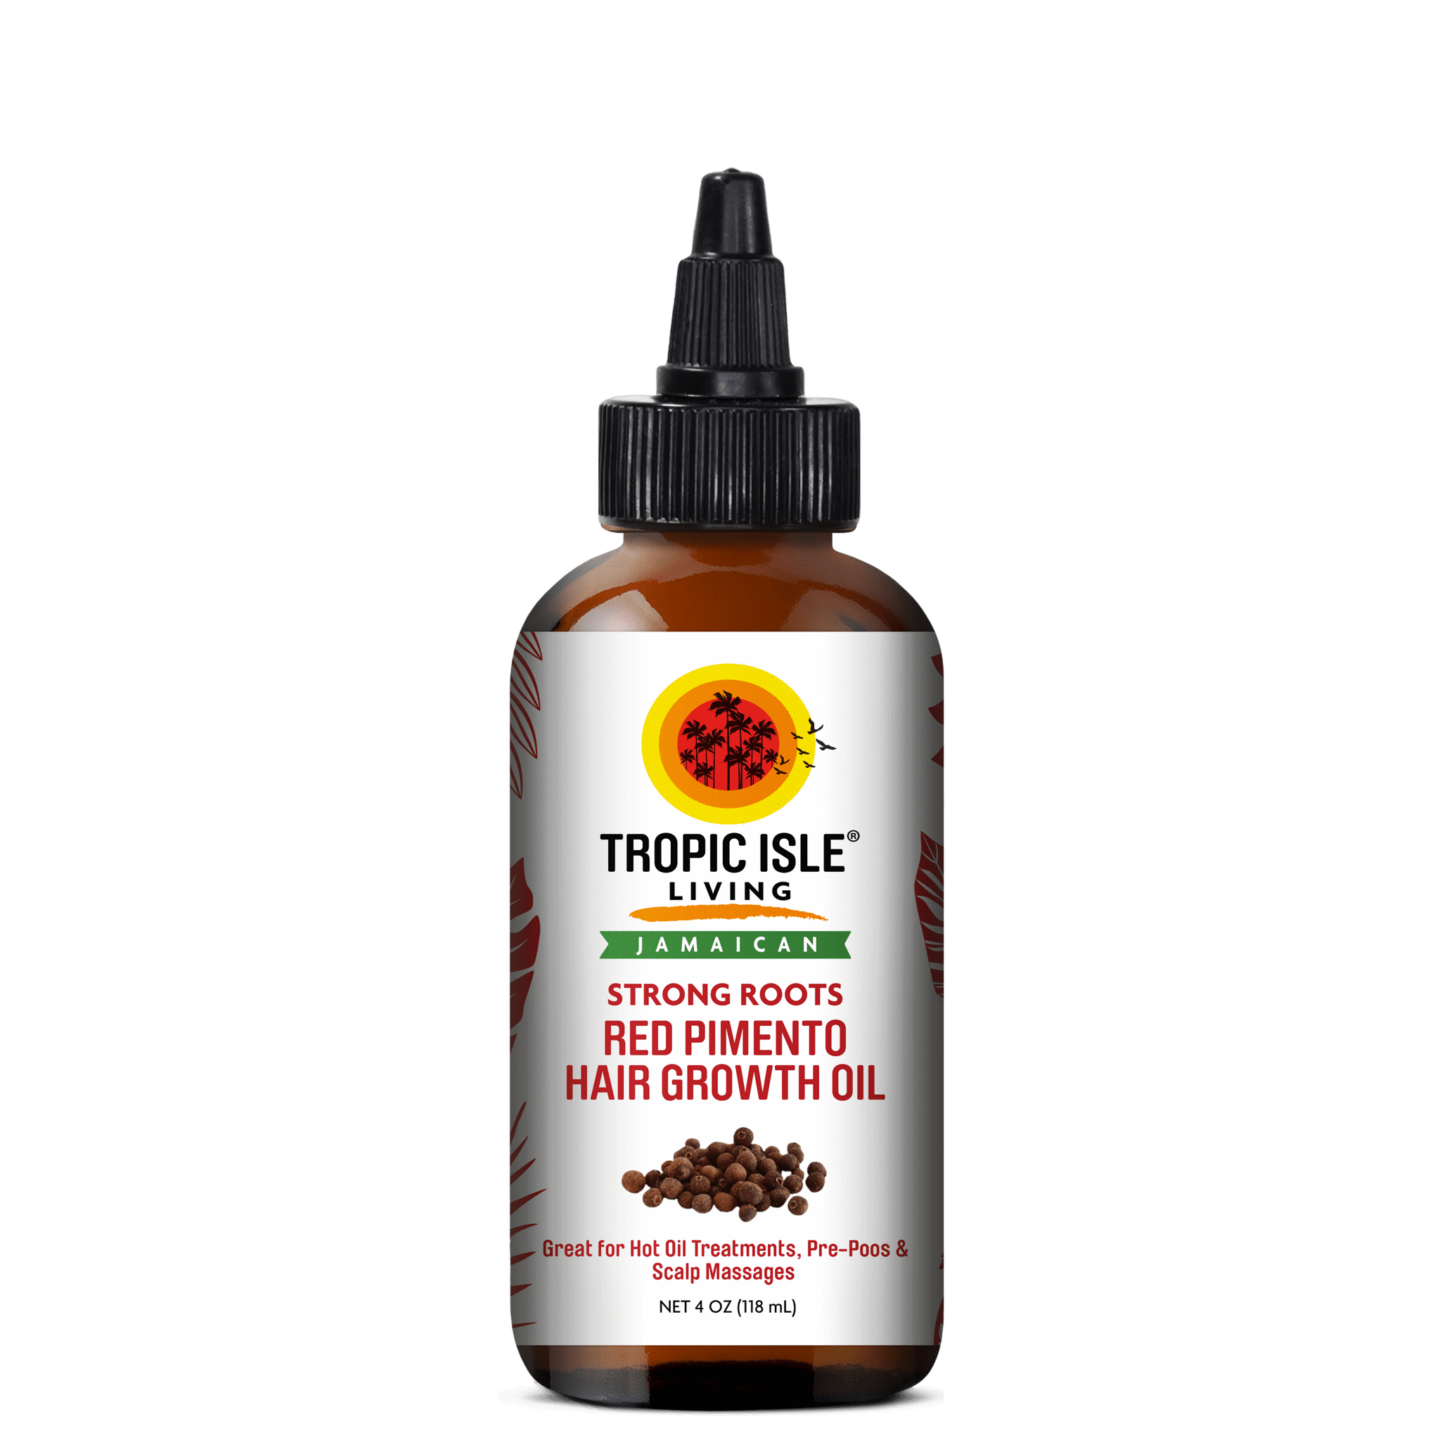
The oil I use is the Red Pimento Hair Growth Oil from Tropic Isle Living. The brand was founded by a Jamaican couple in the Bronx in 1992, and they have since expanded all over the world. They’ve been sold in beauty supply stores, health food stores, and even major retailers like Walmart. If you’ve read through any of my past posts, you know I love shopping from BIPOC-owned brands when I can, but I actually didn’t find this company while looking for a Black-owned hair oil company; I found it because I’d seen so many curly-haired YouTubers sing its praises while researching to build my own routine. You can buy the Red Pimento Oil here!
I suspect the reasons I’ve been seeing the benefits of using this oil are twofold. First, applying oil to my scalp before washing my hair protects my scalp’s natural oils from my shampoo, keeping it in balance. If the natural oils on my scalp aren’t completely stripped away, my scalp doesn’t get dried out to the point of having dry patches that are constantly flaking. This balance also prevents my scalp from going into overdrive and overproducing oil to compensate for the dryness (source); it’s that oiliness that made my buildup and dry skin clump together and form bigger flakes. Second – the main ingredient in this oil is castor oil, which is often-cited as an excellent product for hair growth; a welcome side effect for me (source).
Here’s the important part: I apply the oil to my scalp before I wash my hair every single time. At a minimum, I apply the oil ten minutes beforehand. If I know when I’m going to wash my hair the next morning, I leave the oil in overnight, but I won’t leave it in for more than 24 hours to avoid clogging my pores.
My application process is simple; I start by applying the oil directly to scalp. The pointed nozzle on the bottle is so helpful for quick application (I timed it once – it takes me 22 seconds to coat my scalp). I’m able to apply the oil directly onto my scalp without coating the rest of my hair with it – which would take forever to wash out – and it’s not as messy as applying oil from a bowl (goodbye, drips!). I simply twist the tip to open it, turn the bottle upside down, and imagine I’m drawing stripes on my head – first down my part, and then going from my part down each side of my head.
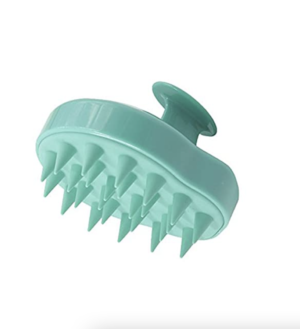
Then comes the scalp massage. After application, I spend at least 5 minutes massaging my scalp before I let the oil sit, to complete at least a whole 10 minutes before jumping in the shower. I never use my fingernails for the scalp massage even if my scalp is feeling itchy. I always make sure to just use the soft pads of my fingertips or a silicone brush to massage the oil into my scalp (you can get a silicone brush here). Using your fingernails to scratch your hair can scratch your scalp and leave tiny abrasions, where you can get an infection or hurt your hair follicles and contribute to worse hair loss (source).
At first, you may notice that as you massage your scalp, some of your hair comes dislodged and sheds. Just keep in mind that this is hair that would’ve already fallen out because it’s natural to lose approximately 150 strands of hair a day! Often times, if we don’t wash our hair every day or keep our hair in a ponytail then the hair that would’ve fallen out doesn’t have a chance to leave our heads and will come out during the massage. When I do this scalp massage, I end up losing less hair in the shower because it all comes out beforehand.
It may take a couple of wash days for your hair to get used to applying oil beforehand and not completely stripping away the oil, but once it does, your hair will balance itself out and will naturally produce less oil. This means you can stretch out your wash days! Also, don’t get discouraged if you have to double shampoo or lather a bit more than usual to get all of the oil out on the first wash day. It took me two wash days to really perfect my routine and make sure that I got all the oil out.
That’s it for my routine! I hope this routine is helpful! Let me know if you have any questions in the comments below. And if you try anything I talked about here, let me know how it works out!
Sources:
- Dobrev, H. (2007). Clinical and instrumental study of the efficacy of a new sebum control cream. Journal of Cosmetic Dermatology, 6(2), 113–118. https://doi.org/10.1111/j.1473-2165.2007.00306.x
- Tessema, S. S. (2019). Physicochemical characterization and evaluation of castor oil (R. communis) for hair Biocosmetics. American Journal of Applied Chemistry, 7(4), 110. https://doi.org/10.11648/j.ajac.20190704.11
- Draelos, Z. D. (2010). Care of aging hair and photoprotection. Aging Hair, 183–191. https://doi.org/10.1007/978-3-642-02636-2_17
Some of the links above are affiliate links, which means that if you choose to click the link and make a purchase, I might make a small commission. This does not cost you anything, nor does affiliate eligibility ever influence what products I choose to write about. For more information on affiliate programs, please see the Affiliate Disclosure.